Right then? Fired up and ready to go? In today’s post we’ll take a step-by-step walk through of how to install Xcode, an essential prerequisite for iOS App Development.
- Edit your source code
- Turn that code into an application that the computer or iOS device can run – also known as building
- Fix any mistakes (or bugs) in your application – also known as debugging
- Run the resulting application.
Xcode and the developer tools are a free, albeit an initially hefty, download from Apple but the installation process is pretty simple so lets walk through it.
Ensuring that the Mac App Store is Installed
The easiest way to get Xcode and the development tools installed is via that Mac App Store.
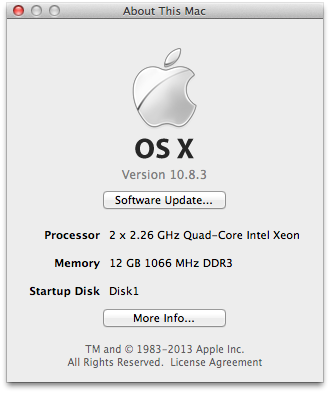
First make sure that the Mac App Store is installed by making sure that your OS X installation has been updated to a version later than 10.6.6. You can check the version of OS X that you are running by selecting the in the top-left hand corner of your desktop and then selecting About This Mac from the displayed menu. Your current version number should be just below the Apple logo.
If it displays a version less than 10.6.6, you will need to update your installation. If you need to, select Software Update… and install any updates that are available.
How to Install Xcode and the Development Tools
Now that the Mac App Store has been installed on your System we should have everything we need to install Xcode and the Development Tools. Kick off by selecting the Mac App Store icon from your dock. It should look something like this:
Alternatively, if you’ve removed the Mac App Store from your dock (many do, due to lack of space) you can select ⌘+Space Bar to open the Spotlight Menu and type App Store in the search field. It should be the top hit in Spotlight’s search results.
Once the Mac App Store application has started, the quickest way to find the Xcode Development Tools is by typing Xcode in the search-bar at the top-right hand corner of the Mac App Store window.
As you can see, Xcode is usually the first of the applications displayed in the results and if you select the Xcode applications title, you should see more information such as when the particular version was released, the latest changes that went into that release as well as being able to read other peoples comments and feedback on the tools.
When you’re ready, select the Install button in the top-left of the window (below the Xcode icon) to get the installation underway. You might have to enter your Apple ID and password (I did) so if prompted, fill in your Apple ID details and select Sign In to start the download.
Once you’ve selected Sign In, Xcode and the development tools will be downloaded and installed in the background by the Mac App Store application. The Launch Pad icon in your dock should give you some feedback about how the download is going, either by a little progress bar or, if you hover your cursor over the Launchpad icon in your dock, some more detailed numbers about its progress. As I mentioned earlier, at 1.65GB it isn’t a small download so it might take a bit of time depending on your internet connection.
Once the download and installation has completed you should find your new Xcode developer tools hidden away within your Applications folder. It’s a personal choice, but once installed, I drag the Xcode.app to my dock for easy access. I just find it more convenient that way, especially if I’m going to use Xcode with any sort of frequency and I’d recommend you do the same.
And that, ladies and gentlemen, is it. You now have all the software you need to develop Objective-C and iOS applications and distribute them to the masses. Start up Xcode by either selecting the icon in the dock, selecting Applications > Xcode or by selecting ⌘+Space Bar to open the Spotlight Menu, typing Xcode in the search field, and selecting it from the search results. (Wow, so many choices!).
Summary
In today’s post we’ve seen how to install the Xcode and the Developer tools, one of the critical prerequisites for getting started with Objective-C and iOS applications. Over the course of this blog we’ll become extremely familiar with Xcode, we’ll tour it’s interface and we’ll use it to both learn Objective-C and iOS and beyond that develop iOS applications or your own. Congratulations, your one step closer to app store world domination!
